Saturday, 13 June 2015

Back to blogging with Thai Red Chicken Curry !!


Its been more than an year since my Last Blog post!! ..There have been so many changes  in life all this while ...from shifting to India.. to joining work ...raising a toddler...setting up our new home.
But this blog of mine was always there at the back of my mind ..and finally I  am here reviving my blog...reliving my passion for food and cooking.

I am so proud to recreate dishes which I had first tasted in London ...thanks to the ingredients we get in India too...like Pesto is a staple in my fridge..Hummus and Pita is what I love eating in this summery weather.
Recently I found lemongrass at a supermarket and couldn't stop myself from trying this amazing Thai curry.The best thing is that you can make the Thai curry paste and keep it in fridge for all those weekends when you just feel lazy and still want a hearty homemade lunch.Its ready in a jiffy !!
I have never bought a ready made Thai curry paste and would not recommend as well..coz the freshness and simplicity which homemade paste brings.Hubby just loved it and its our weekend favourite thesedays.You can throw in some chicken pieces or tofu/paneer for a veggie version.

Here's how you can make this delicious and exotic Thai curry:


Ingredients 

For the paste:

7-8 Whole red chillies
1 small Onion
2 stalks of chopped lemongrass
2 tbsp coriander seeds
1 tbsp cumin seeds
1 tbsp grated ginger
2 tsp chopped garlic
1 tbsp coriander stalks
1 tsp lemon rind
Salt to taste

For the curry :

300 gm Boneless chicken pieces
1 carrot
200 ml Coconut milk


Method

Soak the red chillies in warm water for fifteen minutes,Take all the ingredients in the paste category and grind them adding little water.Now take about 1 tbsp oil in a wok and fry this paste  till the oil separates.Your Thai curry paste is ready to use or store.
To make a Thai chicken curry take the paste in a wok and add the coconut milk along with 1 cup of water.Cover and cook for five minutes.Now add the chicken and carrot pieces and cook till the chicken is cooked well.
Garnish with coriander leaves and serve hot with rice.

Have a great weekend !!


Notes

  • You can use carrot,tofu/paneer ,broad beans and brocolli for a veggie version
  • This paste can be stored in refrigerator for 10-15 days in a airtight container.
  • You can increase the amount of chillies depending upon how hot you like.
  • Original Thai curry calls for Galangal but I have used ginger which tastes similar and is easily available in India.



Saturday, 4 January 2014

Happy new year with potato focaccia


"Tomorrow is the first blank page of a 365 page book.Write a good one."


Here comes the new year with new hopes... new dreams.... and new aspirations !!
Here's wishing all my readers a HAPPY NEW YEAR !!!
For me its NEW in every way  coz I am back to India for good !!So a new year and a new start!!
This was the reason of my absence as I was busy packing bags back to India.I promise I will be back with a bang once the settling process is done !!

Talking about focaccia ....there was time and had not even heard of it....and now it such a favourite that it features our dinner almost every fortnight....the best thing about this bread is that its so flavourful that its a meal in itself...you just don't need any dip...butter...cheese to enjoy it...!!
Potato is one of the common ingredients in our household so that's why I thought of making potato focaccia It is the star ingredient as there is mashed potato in the dough which makes it so moist  and potato slices as toppings which makes it a show stopper dish...!!!


INGREDIENTS:

  • 3/4 cup boiled mashed potatoes
  • 1 boiled potato sliced
  • 1/2 cup warm water
  • 1 teaspoon instant dry yeast
  • 1 1/5 cup all purpose flour
  • 1 teaspoon salt
  • 2 tablespoon olive oil
  • 6-7 slices of onion
  • 1 tablespoon grated parmesan cheese
  • ¼ teaspoon chilli flakes
  • 1 teaspoon chopped coriander(or any other herb)


METHOD:

  1. Mix yeast in warm water and leave it till to activate.
  2. Mix together the flour, salt, olive oil and mashed potatoes in a mixing bowl.
  3. Once the yeast has frothed, add it to the flour mix and knead till the dough becomes soft.
  4. Lightly grease a bowl, place the dough in it, cover with a wet cloth and set aside in a warm place to rise.
  5. After about 2 hours, the dough would have doubled in size, so punch it down, knead for about 2 to 3 minutes and place it in a baking pan to proof again for 30 minutes.
  6. Toss the potato slices in oil, salt and chilli flakes.
  7. Once the dough has risen again, lightly dimple it at intervals with your finger.
  8. Top with the potato slices, onion slices,coriander and cheese .
  9. Place in an oven preheated at 190C and bake for 25-30 minutes or till golden brown.
  10. Serve warm.


This recipe was chosen among the top ten winners of the Unusual Baking Challenge by Love Food & Hate Waste and features on their website as well.


Thursday, 7 November 2013

Banana pancakes from leftover bananas !!!


You know how crazy my hubby is about pancakes ....I have already shared with you the usual pancake recipe here...
The other day I had these bananas going overripe and I was not in a mood to bake a bread (which is my fav from ripe bananas ) I tried making pancakes with bananas and to my surprise they were better than what I had expected...the texture was fluffy and the pancakes looked great and tasted much more better than the plain ones.
So the next time you have overripe bananas don't even think twice before trying these pancakes which are so easy and ready in a jiffy.
While the weather is all cold and grey these pancakes will surely lift up your spirits...do try these and lemme know how you liked them.


Here's the recipe

Ingredients

1 cup flour
1 tbsp sugar
1 1/2 tsp baking powder
1/2 tsp salt
1 egg
2/3 cup milk
1 tbsp melted butter
1 ripe banana(mashed)
1/2 tsp vanilla extract


Method 


  • Combine flour,sugar,baking powder and salt.In a separate bowl mix together egg,milk,vanilla extract and mashed bananas.
  • Stir the flour mixture into the banana mix and add melted butter.
  • Heat lightly oiled griddle or pan and pour in the batter using a laddle. Flip it when bubbles appear and cook well on both the sides.Serve warm with maple syrup or honey .
  • Enjoy these fluffy pancakes with fruits and for a guilty version you can even serve it with whipped cream. !!!


Monday, 28 October 2013

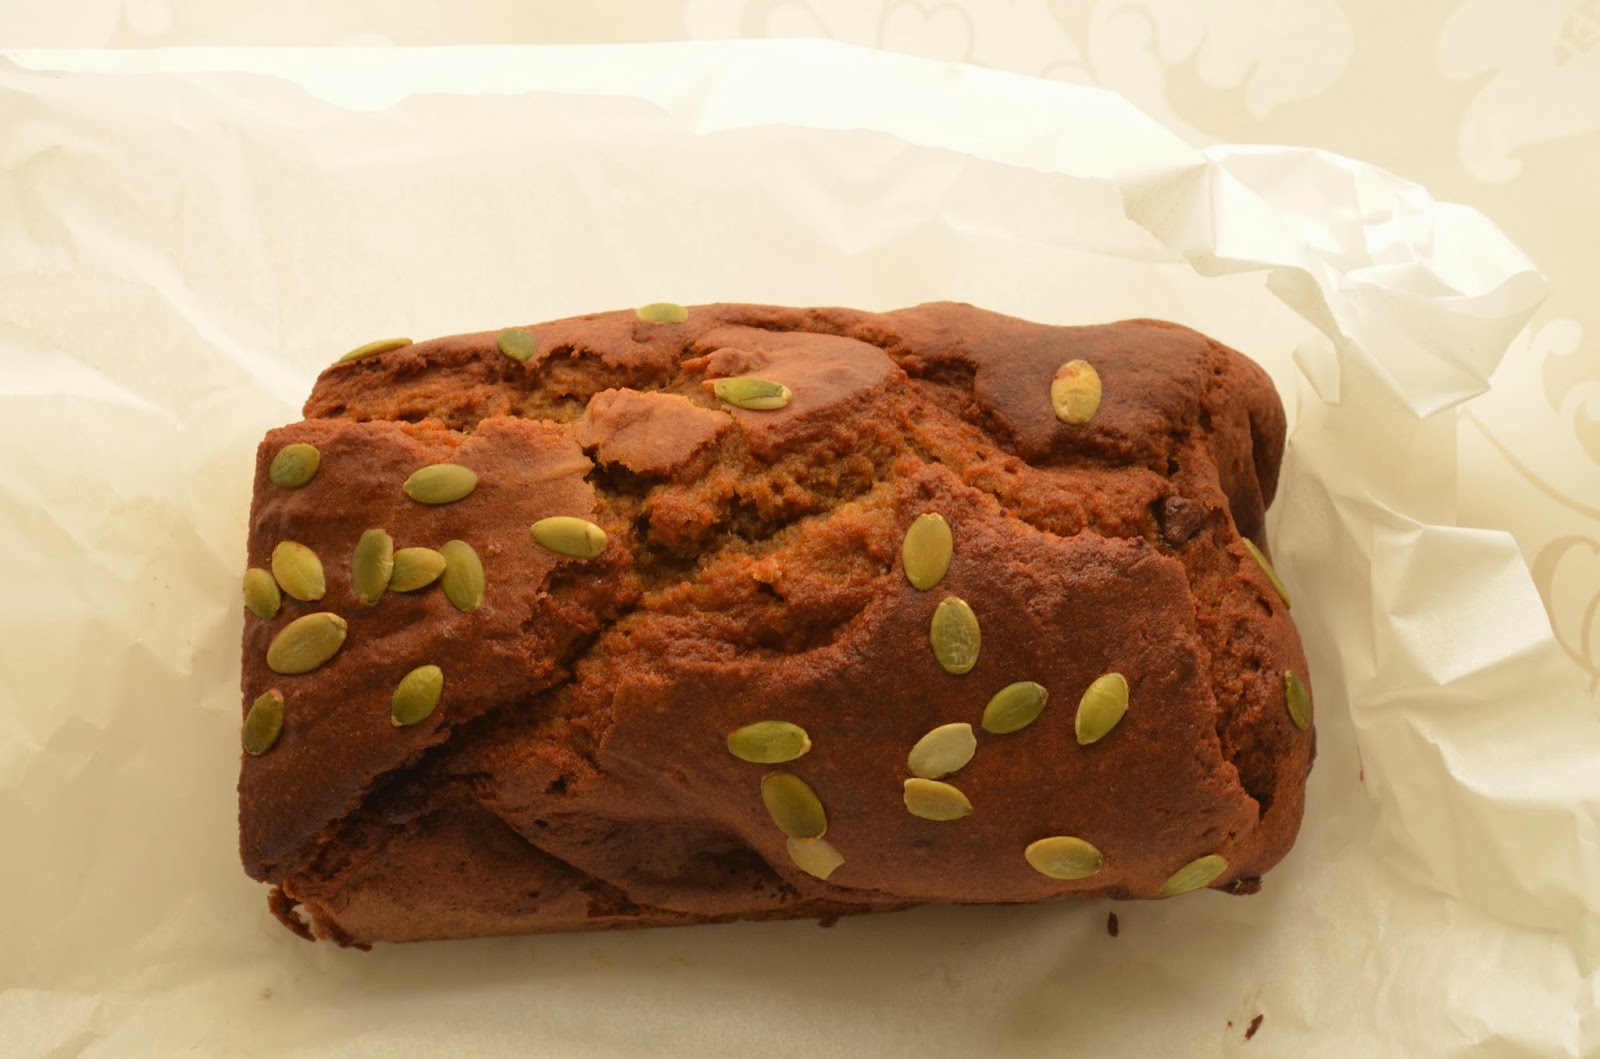
Celebrate Halloween with butter free whole wheat squash bread !!


Gone are the bright sunny days ...gone are those barbeques and picnics ...gone are those summer dresses....its fall time !!
Well the fall season heralds the winters...and brings back your jackets and sweaters out...and so I hate that.I needed some baking to uplift my spirits and what better than a seasonal squash bread with the goodness of whole wheat and flaxseed. 

This bread was a surprise winner ,one coz its guilt- free, and second its perfect for this season.
So this  halloween try this beautiful recipe and surprise your guests with this guilt free version. 


Ingredients

1 1/2 cup whole wheat flour
3/4 cup squash puree *
2 eggs
1/4 cup oil
1 tsp salt
1 tsp baking soda
1/2 tsp baking powder
1/4 tsp cinnamon
1/4 cup ground  flaxseed
3/4 cup muscovado sugar
1/4 cup water
2 tbsp maple syrup(or honey)
3 tbsp chocolate chips (optional)


Method


  • Preheat oven to 180 C.
  • Combine flour,salt,baking powder,baking soda and cinnamon and keep aside
  • Mix water and flaxseed and keep aside for 5 minutes.
  • In a bowl mix sugar,oil,eggs,squash puree and  maple syrup until blended.
  • Add flour and mix till combined.Fold in the chocolate chips.
  • Pour into a loaf tin and bake it for 45-50 minutes.


*For squash puree chop squash into small pieces and oven roast in a lined baking tray for 30-35 minutes at 200C. Allow it to cool and then blend into a smooth puree.

Enjoy this comforting bread with a cuppa !!!
HAPPY HALLOWEEN !!!!


Monday, 16 September 2013

Creamy cannellini bean hummus


Both hubby and I love trying out new cuisines and we have our favourites for a period of time ... and then once we are bored we try out another cuisine.Our current favourite is middle eastern...so we are trying all kinds of dips with pita bread and pair it with salad and chicken wings which makes a complete meal.For the last month our friday dinners have been like this and we are just loving it !!
Hummus is one of the most popular dishes of middle eastern cuisine...the best thing is that it can be prepared in a jiffy and goes well with pitas,oatcakes,crackers,chips..!!
I used to make hummus using garbanzo /chickpeas but somehow could'nt get the same taste I enjoy at restaurants ...so when I tried it with cannellini beans to finish off a can lying in my store cupboard,I was really pleased with the result.
This is perfect for picnic,parties and even your mid-evening snacking !!!(and its low cal too)

Here's the recipe 

Ingredients

1 can cannellini beans
2 garlic cloves chopped
3 tbsp tahini paste
3 tbsp extra virgin olive oil
1 lemon(juice from 1 lemon)
Red chilli powder to sprinkle
Salt to taste
Coriander for garnish (optional)


Method

Put the beans into a mixer.Add lemon juice,garlic,tahini paste and salt..slowly pour in the olive oil and process until smooth and thick.Sprinkle red chilli powder and garnish with coriander.Refrigerate it and serve with pitas.

You can even use it as a sandwich spread ..I'll be sharing that sandwich recipe very soon ...so stay tuned :)


Friday, 6 September 2013

Soft and scrumptious coconut buns!!


Well you know how much I love coconut... even my first recipe on the blog was of coconut laddu. I like it in all forms-fresh coconut,dry coconut,coconut water,coconut sweets,coconut in curries almost everything!!
But I had no idea that adding coconut to buns would give such an amazing flavour until I tried these.Fresh baked breads have their own charm...the heavenly smell..the soft dough..all this just lifts up your spirits !!
We had these yummy buns for breakfast and they just got finished in minutes...soft,fluffy with a little sweetness and a touch of coconut.This is a perfect treat to welcome winters :)

This also goes to my entry for Bloggers Buzz Photography Club Assignment 1.


Ingredients

4 cup white bread flour
1 egg
2/3 cup coconut milk
2/3 cup warm water
1/3 cup sugar
2 tbsp butter
2 tbsp milk powder
2 tbsp dessicated coconut
3 tsp yeast
1 tsp salt


Method
  • Add yeast in a bowl of warm water and let it rest for 5-8 minutes till it activates.In a large bowl add milk powder,sugar,dessicated coconut,flour,beaten egg,salt,melted butter,coconut milk and yeast mixture.
  • Mix well to form a dough and knead for 7-8 minutes till it forms an elastic ball.
  • Cover it with cling film and rest it for about two hours until the dough has doubled in size.
  • Gently press down knead a few minutes and rest for 10 minutes.Divide into small portions and shape into buns.
  • Arrange in a baking pan and brush it with egg wash.Bake it in a preheated oven at 180 for about 20-25 minutes.


I promise your home will smell like heaven !!


Tuesday, 20 August 2013

Celebrate rakshabandhan with indian shortbread cookies ~ Naankhatai


Though I may be far
But we are close in each others thoughts
In each others prayers
that's the way we are always together
Happy Rakshabandhan !!

This greeting goes to my brothers in India :)

Festivals and Celebrations bring out so much fun and excitement in our lives and though we are far away from our country I never miss a chance to celebrate every little festival in our own sweet way.
Rakshabandhan back home was always so much fun, specially when you are a sister you are being bestowed with all gifts and given so much love.
As a food blogger ,festivals give a chance to try out something sweet.So for this ocassion I have made nankhatais ~ a traditional indian shortbread cookie.


Ingredients

1 1/4 cup Gram flour
1/4 cup Suji
1/2 cup All purpose flour
1/2 cup Brown sugar
1/2 cup Butter
A pinch of Salt
1/2 tsp Baking powder
1/4 tsp cardamom powder
10-12 halved almonds


Method

Preheat oven to 180 degrees and line a tray with baking paper.In a bowl whisk sugar and butter till light and creamy.In a separate bowl sift together gram flour,suji,all purpose flour,salt ,cardamom powder and baking powder.Now mix the butter mix in the flour and form a dough.Knead for a couple of minutes and keep it in the fridge for about half an hour.Take it out and form into round shaped discs.Place an almond half on top and bake these goodies for 15-18 minutes till they are done.

Enjoy the aroma filling your home.This nankhatai is sure to raise a festive spirit in your home so go ahead and try these goodies !!
Wishing everyone a happy rakshabandhan !!